
Understanding Quick Blanching
Quick blanching is a cooking technique that involves briefly immersing vegetables in boiling water, followed by immediate cooling in ice water. This process is pivotal in achieving vibrant colors, enhanced textures, and heightened flavors in green vegetables. By understanding the science and techniques behind quick blanching, you can elevate your culinary skills and impress your guests with perfectly prepared greens.
The Science Behind Blanching
Blanching serves multiple purposes in vegetable preparation. The primary goal is to inactivate enzymes that can cause loss of quality in flavor, color, and texture. For green vegetables like beans, broccoli, and spinach, enzymes lead to dull colors and mushy textures if left unchecked. When vegetables are heated, the cellular structure briefly softens, allowing pigments like chlorophyll to be released, resulting in that vivid green hue.
Moreover, blanching reduces the cooking time for later preparations, enhancing the overall texture of the vegetables. It also makes them easier to digest while eliminating surface dirt, bacteria, and pesticides. The quick transition from boiling water to ice bath essentially locks in the nutrients and flavors, ensuring that they are not lost during other cooking methods.
Choosing the Right Vegetables
Not all vegetables respond well to blanching. For optimal results, focus on those that are dense and can withstand brief cooking without losing their structural integrity. Common candidates include:
- Green Beans: Retain crispiness post-blanching.
- Broccoli: Maintains its bright green color and firm texture.
- Asparagus: Enhances tenderness while preserving flavor.
- Peas: Become sweeter and more vibrant.
- Spinach: Softens without becoming overly mushy.
The Quick Blanching Process
Step 1: Preparation
Start by thoroughly washing the vegetables to remove any dirt or residues. For uniform cooking, cut them into even-sized pieces. For example, trim green beans to similar lengths or cut broccoli into florets.
Step 2: Water Boiling
Fill a large pot with water—approximately one gallon per pound of vegetables. Add a generous amount of salt (about 1-2 tablespoons); this not only seasons the vegetables but also helps maintain their color. Bring the water to a robust boil before adding the vegetables.
Step 3: Blanching
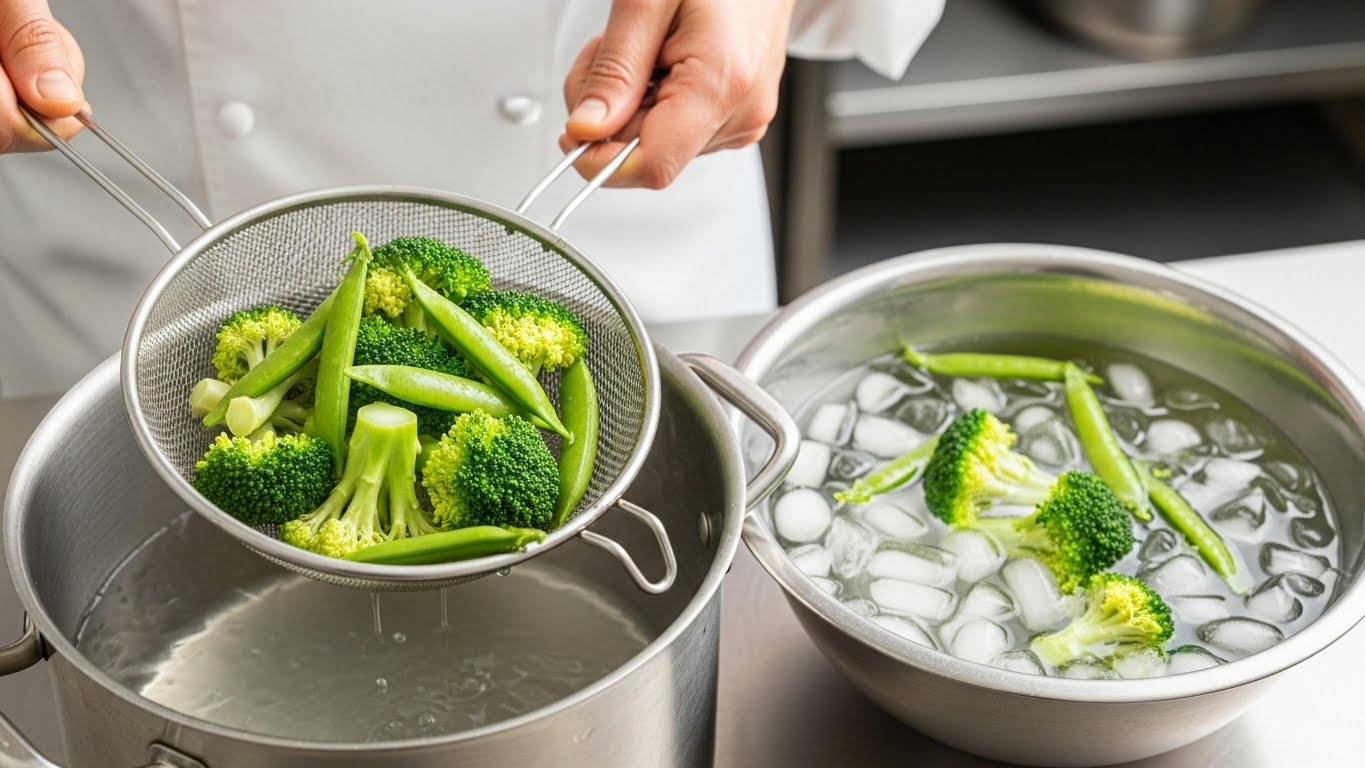
Introduce the prepared vegetables into the boiling water. Use a blanching basket or a metal strainer for easy removal. The blanching time varies but typically ranges from 1-5 minutes, depending on the type and size of the vegetables. For instance, green beans require about 3 minutes, while asparagus may only need 2 minutes. The key is to monitor them closely to achieve the desired crisp tenderness.
Step 4: Shock in Ice Bath
As soon as the time is up, swiftly transfer the vegetables to an ice bath. Fill a large bowl with water and ice cubes before you start blanching. The ice bath halts the cooking process, locking in the bright color and crunchiness. Leave the vegetables in the ice water for as long as they were blanched; this typically equals 2-5 minutes.
Step 5: Drain
Once cooled, remove the vegetables from the ice bath and drain them in a colander. Pat dry with paper towels to remove excess moisture, especially if you plan to sauté or stir-fry them afterward.
Shocking: The Cooling Down Phase
The shocking process is integral to the effectiveness of quick blanching. By rapidly cooling the vegetables, shocking prevents further cooking and helps maintain their vibrant color. This contrasts with slow cooling, which can lead to mushiness and loss of nutrients.
Shocking also prepares vegetables for freezing. Properly shocked greens can be stored in airtight bags or containers, significantly extending their shelf life while retaining flavor and nutritional value.
Benefits of Blanching and Shocking
- Color Retention: The vivid green colors of vegetables are preserved through the inactivation of enzymes and rapid cooling.
- Nutrient Preservation: Quick blanching helps retain essential vitamins and minerals by minimizing the time they spend in water.
- Flavor Enhancement: The process intensifies the natural flavors of the vegetables, making them more appealing.
- Texture Control: Blanched vegetables maintain a crunchy texture, making them a delightful addition to salads or stir-fries.
Tips for Success
- Use Plenty of Water: Ensure that the water remains boiling when adding vegetables to maintain even cooking.
- Avoid Overcrowding: Blanch in batches if necessary. Overcrowding can drop the water temperature and lead to uneven cooking.
- Stir Gently: For large or dense vegetables, give them a gentle stir immediately after adding them to the boiling water for uniform exposure to heat.
- Test for Doneness: Taste-test one of the vegetables before removing them from the boiling water to ensure it is to your liking.
Common Mistakes to Avoid
- Insufficient Blanching Time: Under-blanching can result in retained enzymes, leading